

A Windows user might have faced Error 651. It’s a very common error problem faced by Windows user (especially Windows 7 user) while working online.
If you have also faced this problem and want a stable solution for it, then read this article to understand how Error 651 does occur and how it can be resolved?
How Error 651 does occur?

It occurs when a user tries to establish an internet connection using a broadband device on their Windows PC.
When Error 651 occur, Windows will display, “Modem (or the other connecting device) has reported an error” with a message “Connection Failed with Error 651”.
It generally occurs due to reasons such as:
- IP address conflict.
- Registry error and
- Wrong location of Raspppoe.sys file.
When Error 651 occur we usually tend to restart our computer or modem.
But this issue can be resolved by following the steps discussed.
How to resolve Error 651 in Windows?
Lots of method and suggestions are available to resolve Error 651 issue and together they can confuse you.
So, I have compiled various suggestions from different articles and forums that can help you resolving the Error 651 issue.
1. Uninstall the Modem & Download the updated Drivers:
It’s a very common way to solve the error issues.
You can solve the Error 651 issue by uninstalling the modem and later reinstalling it with the updated drivers.
Updated drivers are important for hardware. Outdated drivers can result in errors.
2. Reconnect Router or other connecting device:
This error can be simply solved by reconnecting the internet connecting device. Just turn off the router or unplug the LAN wire and after 5 minutes turn on the router or plug the LAN wire.
3. Replace raspppoe.sys file from Windows 7 drivers directory:
This method works only for Windows 7 users.
Error 651 issue can also be resolved by replacing raspppoe.sys file from your Windows 7 directory.
To find raspppoe.sys file, go to: C:\Windows\System32\drivers in My Computer on your Windows 7 PC.
Replace the old raspppoe.sys file with new one. You can download raspppoe.sys file from the given link.
LINK: https://drive.google.com/open?id=0B1NPTmRcm3vPa25McHNBS3NPV0E
4. Reset TCP/IP on your PC:
Follow these steps to reset TCP/IP on your PC:
- Launch Command Prompt as Administrator.
- Type the command “netsh int ip reset reset.log” and hit Enter.
- Then restart your PC and the error will be resolved.
5. Recreate Dial-Up connection and Restart ADSL Modem router:
To recreate Dial-Up connection follow these steps:
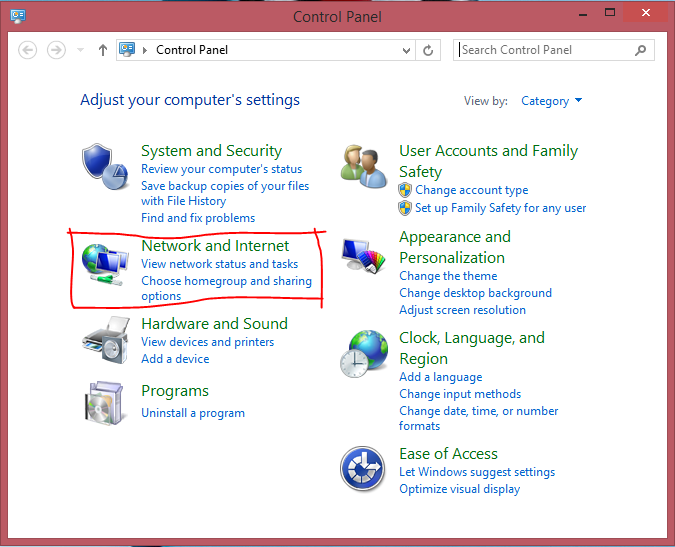
- Open Control Panel and select Network and Internet.

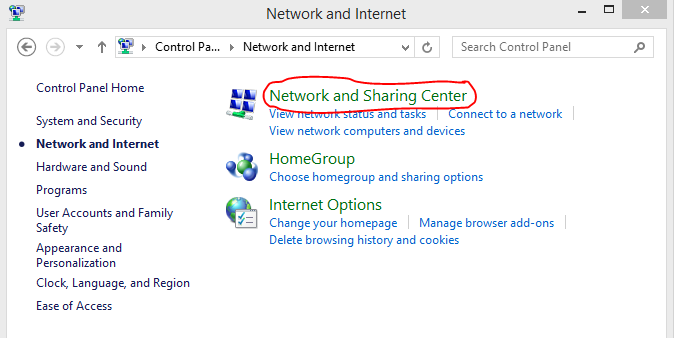
- Go to Network and Sharing Center .

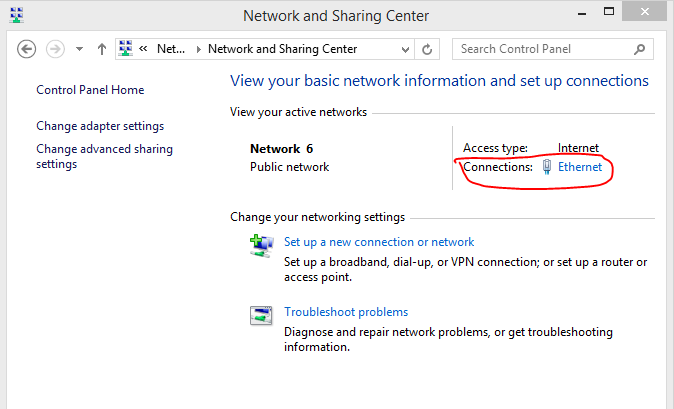
- Click on Change adapter settings.

- Now right click on your dial-up connection and Create copy.
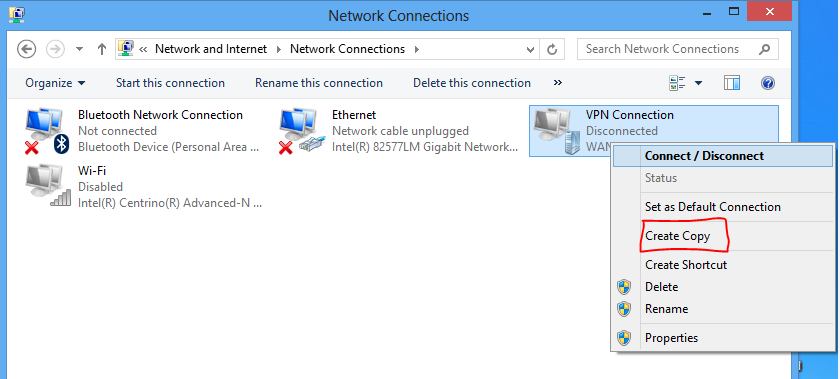
- This will create a copy of existing connection.
- Now delete the old and redial the new connection.
Restarting the ADSL modem/router can also resolve Error 651 issue.
6. Disable Auto Tuning feature:
This method can help you when you are connected to internet through router. Follow the steps to disable auto tuning feature:
- Launch Command Prompt as Administrator.
- Type the command “Netsh interface tcp set global autotuning=disabled” in command prompt window.
- Now restart/reconnect your internet connection.
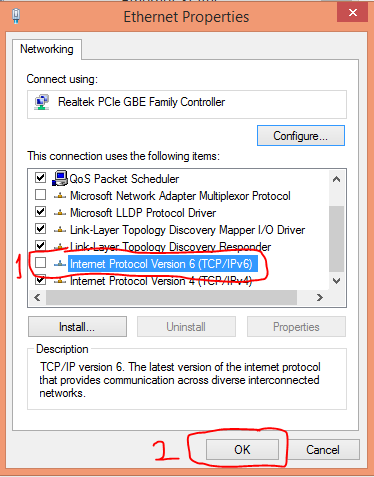
7. Disable IPv6 of your internet connection:
Follow the steps given below to disable IPv6:
- Open Control Panel and select Network and Internet.
- Go to Network and Sharing Center .
- Click on your active network connection.
- Select Properties and switch to Networking tab.
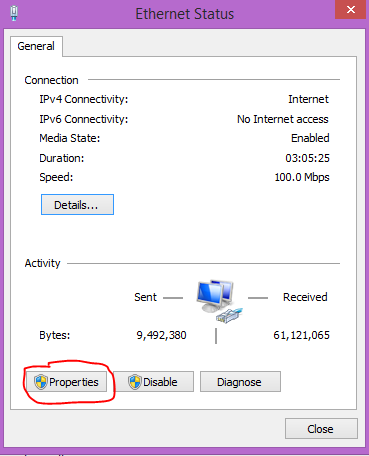
- Uncheck the Internet Protocol version 6 (TCP/IPv6) and click Ok.
8. Reinstall Network Adapter:
This method is very helpful in solving Error 651 issue.
Just follow the steps below to reinstall network adapter:
- Go to Start and search devmgmt.msc
- Click to launch device manager. Look for Network Adapters category and click the expand button.
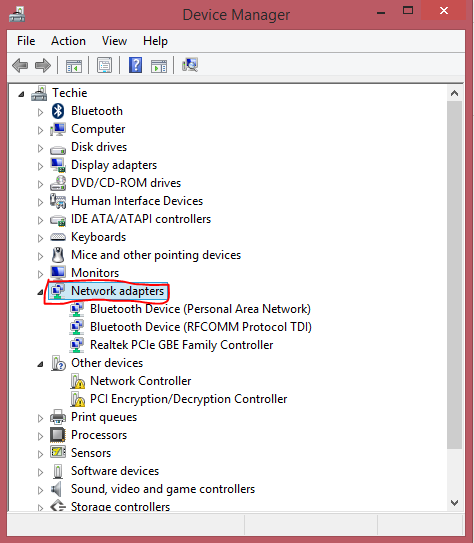
- Now right click the first network adapter and select uninstall.
- Restart the PC and your network adapter will get automatically reinstalled.
9. Perform clean boot:
Clean boot can fix problems, if any, in windows services. Disable all the services before performing clean boot and follow the steps below to perform clean boot:
- Go to Start and search msconfig.exe and click to launch it.
- Under the General tab, click on Selective startup and select Load startup items and switch to Services tab.
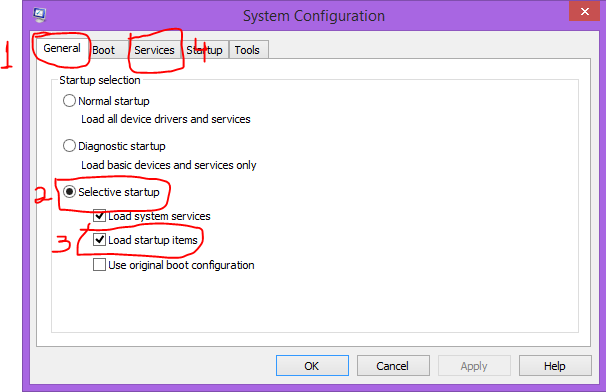
- In Services tab, check Hide all Microsoft services. Now select Disable all to disable all other services.
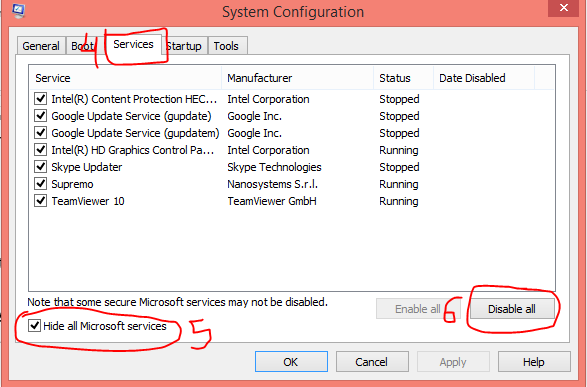
- And Restart your PC to perform clean boot.
Still facing problem with your internet connecting device?
Don’t hesitate and call our technical support team.
Call us at (855) 899-6051.
Our experienced tech support team can help you in solving your various PC issues.